

Adding a Parallax effect on web pages now becomes a trend in the Web Design Universe. When I first viewed the Parallax Effect, I felt amazed. Even though WordPress Twenty Seventeen Theme also comes with Parallax Scrolling Effect. From then I have an urge to learn it and imply it on my site. As I have Zero-Knowledge about Coding. So I have to rely on the page builders. Previously I used the Elementor Page Builder Plugin to add Parallax Particle at my Homepage: Gtarafdar.com.
Later on, I removed the page builder from my site. Now I’m using WordPress Twenty Twenty Theme and comes with a default page scroll parallax effect within it’s Block Editor Feature. Many of us don’t use page builder plugins. In this article, I will share a different and very easy method by which you can create a Parallax Effect without any page builder plugin or any coding knowledge.
Definition of Parallax Effect

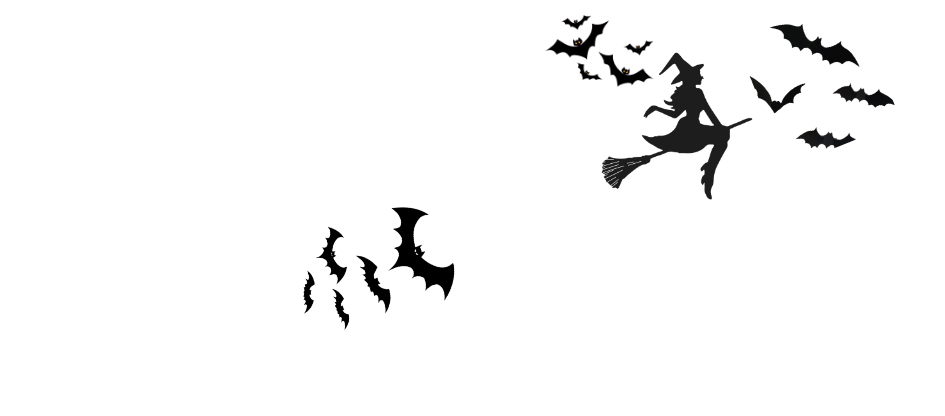


Halloween Mouse Motion Parallax Effect – Gtarafdar
I hope you already know about “What is Parallax Effect!” If you want to to know the explanation here is a simple one for you,
Parallax effect involves a web page’s background moving at a slower rate than the foreground. This creates an illusion of depth to the page, giving the content a 3D effect as viewers scroll down.
Merits of A Parallax Effect
Before starting the tutorial part I like to share some facts. You should aware of these matters. I personally like parallax effects. That’s why I’m trying to learn more about that thing. There are some benefits of having parallax on your site. These are:
- Wow viewers with page depth and animation
- Easily you can grab the attention of the audiences
- Help you to increase the click rate on your CTA as well as help you to increase your sale.
- Help you to reduce bounce rate. If you create amazing parallax effects users definitely spend some times on it to play with the effect. And staying on page time will increase.
- Provoke curiosity
- Reinforce website credibility with innovative interactive viewing
Demerits of A Parallax Effect
Along with those benefits you have to deal with the demerits of the parallax effects on your site. The demerits are as follows,
- If you build your full page with a parallax scrolling effect you have to deal with the SEO issues. You will get fewer options to add meta descriptions and other tags as well.
- Too many images make your site slow. As all the media files create HTTPS Requests to your server and increase the loading time of your site.
- Some audiences don’t like parallax effects.
If you ask my opinion then I will request you to check the benefits. The number of benefits is bigger than the number of demerits.
Types of Parallax Effects
Maybe you can find so many types of parallax effects online. But I personally believe there are three types of parallax effects. They are,
- Mouse Motion Parallax Effect
- Parallax Scrolling Effect
- Parallax Particle Background
Creating Parallax Effects With Zero Coding Knowledge
Among all the Parallax Effects I like the Mouse Motion Parallax Effect. When I first came in touch with that effect it blows my mind. I consult with close buddies who have the knowledge about that matter I became frustrated. They said I have to do so many coding to avail those features on my site. But finally came to a solution. I have a strong belief what I want to make it can be done easily in the WordPress Environment. Because there are so many Best WordPress Plugins. And finally, I found an easy peasy solution to create a Mouse Motion Parallax Effect. Here is an example of a mouse motion parallax effect.


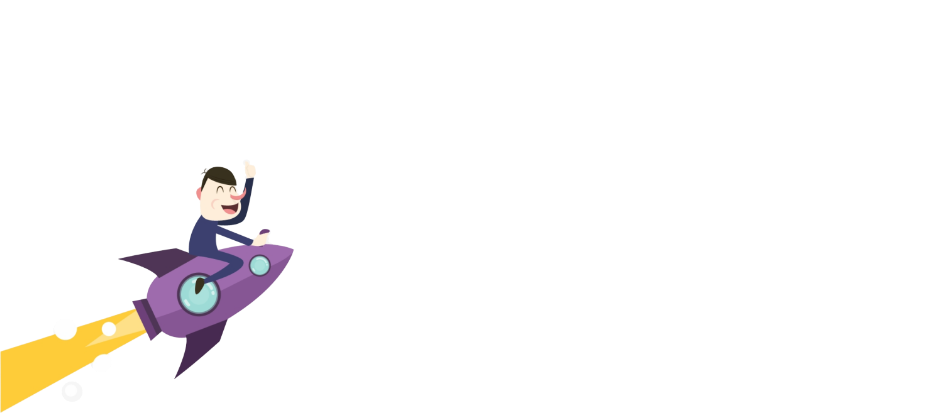

Flying Businessman Mouse Motion Parallax Effect – Gtarafdar
Things You Need to Create A Parallax Effect
To create the Mouse Motion Parallax Effect you need these elements. These are:
- Image Parallax Plugin by Etienne Baudry
- Stock Images. You can get free vector images from Freepik.
- Image Editing Tools, you can choose any one of these tools Sketch/Adobe Illustrator/Adobe XD. I personally prefer Adobe XD. It’s handy and easy to use.
- Finally, Patience.
Step 1
First of all, you have to install and activate the Image Parallax Plugin. Follow the lead, WordPress Dashboard ⇉ Plugins ⇉ Add New Plugin ⇉ Search Image Parallax ⇉ Install ⇉ Activate.
Here is the cool plugin ?

PS: The author didn’t provide an update for a long time. You have to use it at your own risk. But I’m using it. Still didn’t get any major issues.
Step 2
Collect some images. The better way is, first you have to visualize what you want to draw in your canvas. Then started to find the resources. It will be helpful for you. As I previously said you can find your desired images from Freepik. Or you can try PnGTree. But PNG Tree has the limitation. You can download only two images in a single day from your free account.
Step 3
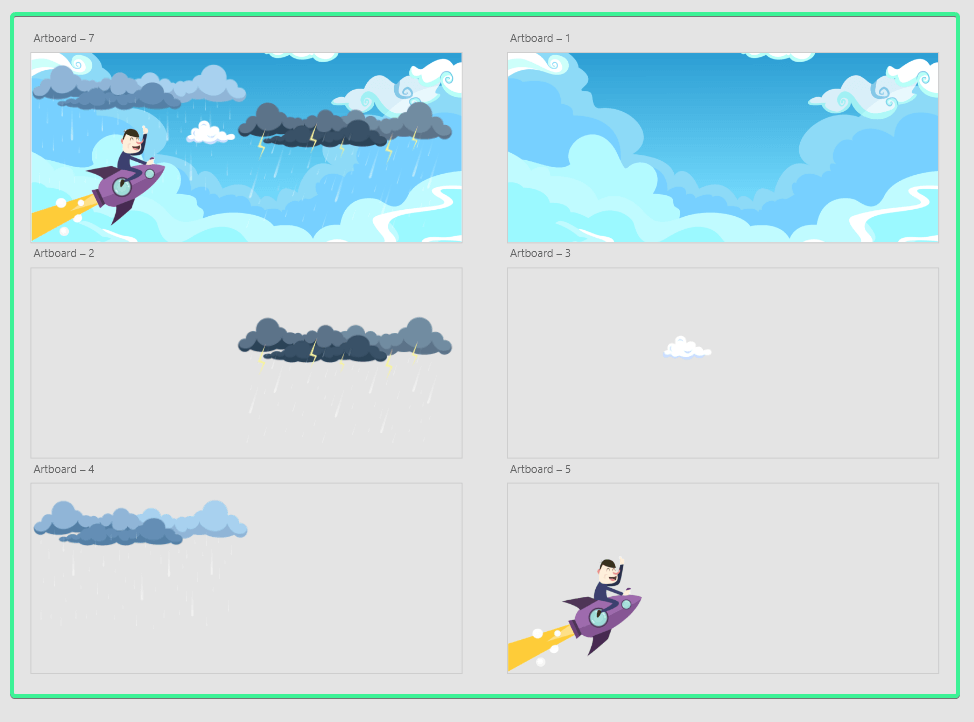
Now you have to work with design tools. If you don’t have enough knowledge about using designing tools then you should go for the simplest design. To make Mouse Motion Parallax Effect with the Image Parallax Plugin, you have to select a background image first for that. Then you have to choose other elements that will interact with the mouse effects. You have to save every image in the PNG format. Please keep the image layout size the same as the background image size. Here is the way how I create my components,
Step 4
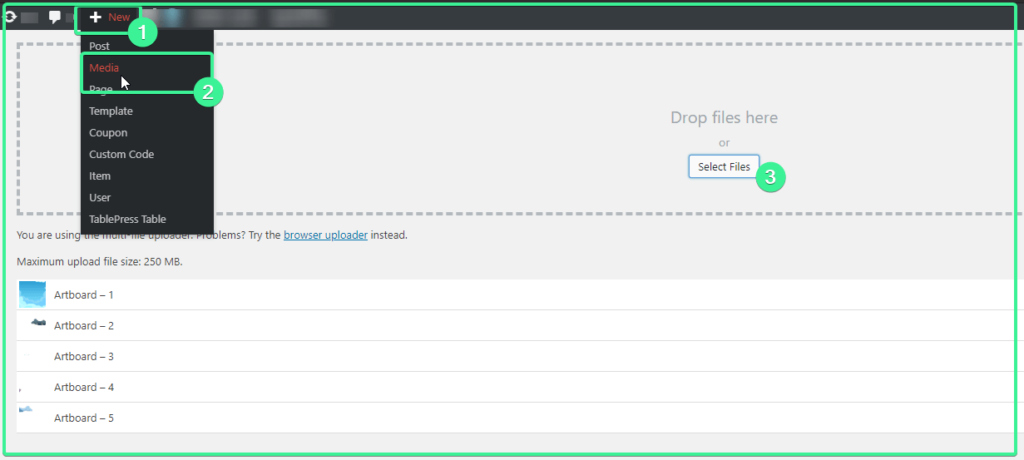
Now you have to add all the images into your media sector. Navigate to, Dashboard Header Bar ⇉ Add New Media ⇉ Select Media Files ⇉ Upload
Step 5
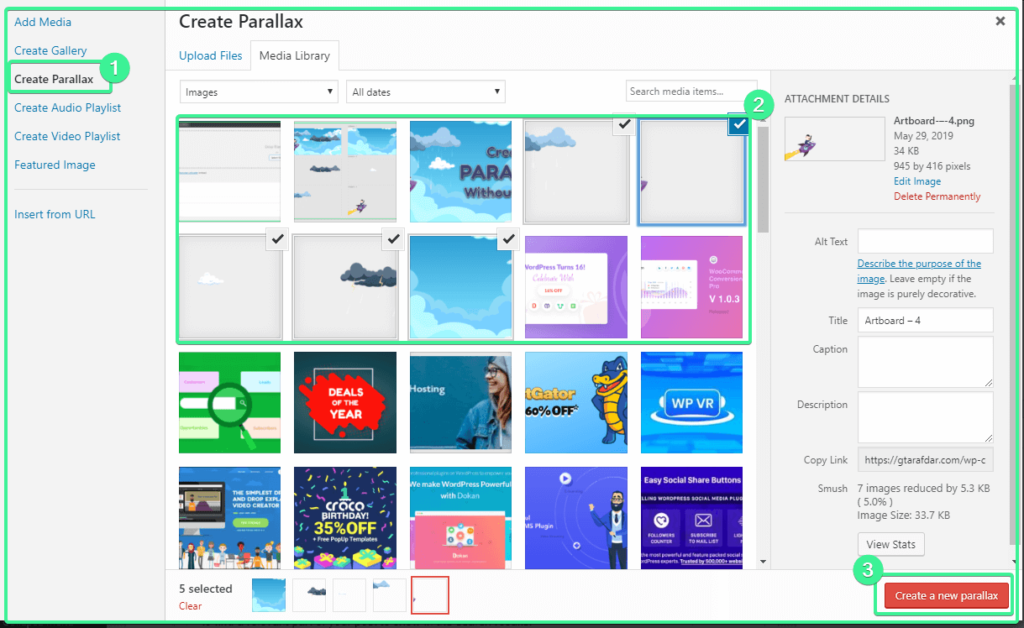
In this step, you have to go to your desired page or post where you want to place your parallax effects. If you are using Classic Editor like me then follow the lead, Click Add Media From The Tool Bar ⇉ Click Create Parallax Tab From Left Side Menu ⇉ Select The Desired Images ⇉ Finally Select The Create A New Parallax From The Bottom Right Section
Step 05 for Gutenberg Users (How to create mouse hover image effect within Block Editor/Gutenberg Editor)
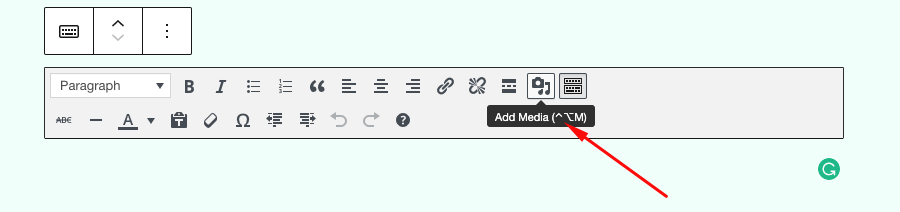
As you are using the Gutenberg editor or block editor then you need to add the Classic Editor block by searching in your block library at first. Then you will get the add media button. Check the Image bellow ?
Now follow this navigation: Click Create Parallax Tab From Left Side Menu ⇉ Select The Desired Images ⇉ Finally Select The Create A New Parallax From The Bottom Right Section
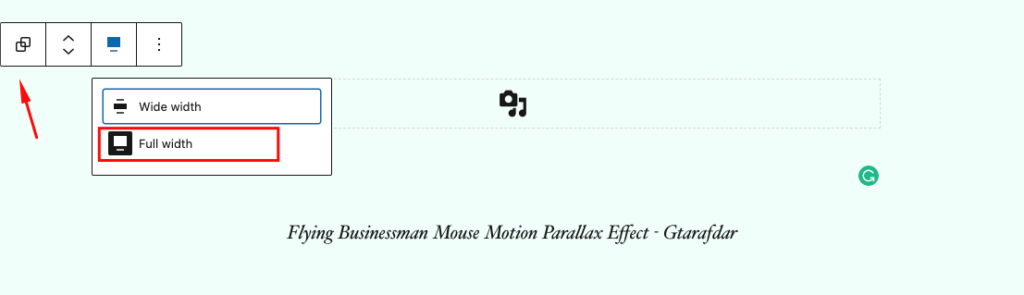
Now add a paragraph block and write the caption. And select the paragraph block and the classic block and make a group of it. Then Set the section as full width. It will help you to set the parallax image in the center. Also, it will help you avoid some glitches. If you don’t do this parallax image feature sometimes create an overlay to all over the editing panel that will block you from editing the other elements. If you face that issue don’t panic. Save your content as a draft or update the content and hit the refresh button it will vanish. It encounters if you want to edit the parallax image from your editing panel. As it doesn’t support block editor fully. Here is the screenshot of the group blocks. ?
Now check the preview.
Step 6
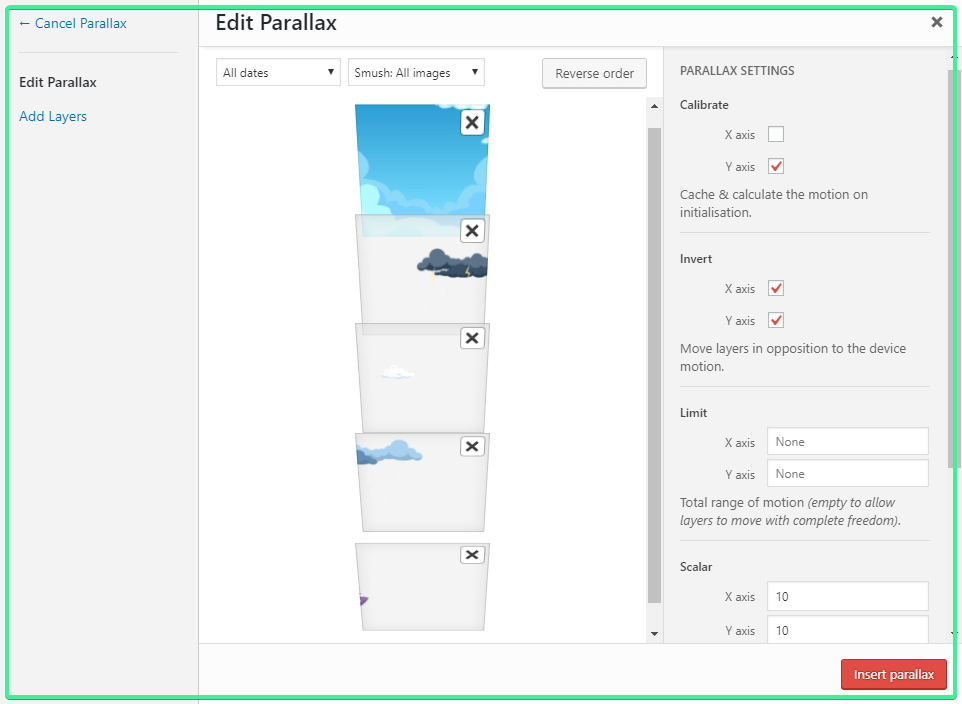
After selecting the images and pressing the new parallax button you will get a window. From that window, you can customize the Parallax effects. You can choose the layer of your elements as per your need. You have the full freedom to control the parallax effects speed, total range of motion, options to invert your elements. You can take the expert opinion of you can fix those things by trial & error method. At the end of everything select the insert button. You will find a media icon in your editor page.
Finally, your Mouse Motion Parallax Effect is ready for shipment. Please give a break now to enjoy your creation. You deserve a clap. That you have shown an extreme level of patience in creating the parallax effect. I’m really happy for you. What do you think is it a very easy solution for making Mouse Motion Parallax Effect! If you feel so then thanks me later.
How to Create A Parallax Scrolling Effect
You can easily create a parallax scrolling effect with your block editor if you are using this. No need to add any other single plugin. Just follow the step and you will know how you can add scrolling parallax effect with Block Editor.
Steps in creating parallax effect with Block Editor
Scrolling Parallax with Block Editor
Add the Cover block from your block library. Change the alignment to Wide Width/ full width. Now choose a background image and set it to fix from the block editing pannel. Now add an elegant effect set an overlay color and enjoy the scrolling parallax effect.
Watch out this short tutorial –

Alternative Plugin for classic editor users
If you want to create a scrolling parallax effect on your site then you can try the Parallax Scroll by Adamrob. You can easily add a scrolling parallax effect by the shortcode of your created effect on your desired page/post.
Tips for Making A Successful Parallax Effect
Before making a parallax effect you need to keep a few things in your mind. Here I enlist some best practices to create a parallax effect,
- Don’t overdo it to make your site too complicated
- Use it to tell a visual story
- Make it fun and engaging with depth using layering
- Emphasize calls to action when directing the visitor through the site
- Think for older browsers and mobile browsing
Closing Annotation
I hope you have enjoyed the whole journey. I tried to share my tiny knowledge about the creation process of parallax effects. If you have any other techniques you can share with me by commenting below. And one more thing please share your work with me by commenting here. It will be a joyous moment for me and also inspire me to write in the future.
2 replies on “How to Create Parallax Effect Without Any Page Builder Plugin or Any Coding Knowledge”
Hey Your way of explaining everything in this post is really fastidious, every one be capable of easily know it, many thanks
Thanks for stopping by and sharing your kind words. Stay connected.